How to Integrate Openchangelog with Keep A Changelog
Learn how to transform your CHANGELOG.md into a sleek website using Openchangelog
Jonas
Oct 19, 2024

Table of Contents
The keep a changelog format is a style guide for changelogs it embraces the guiding principle that changelogs must be written by humans and for humans.
This format has become popular in both open-source and broader development communities because of its simplicity, helping maintainability, its clarity by grouping changes, and its compatibility with Semantic Versioning, making it easy to communicate updates to both technical and non-technical audiences.
But maintaining a changelog without effectively sharing it with your audience is a missed opportunity.
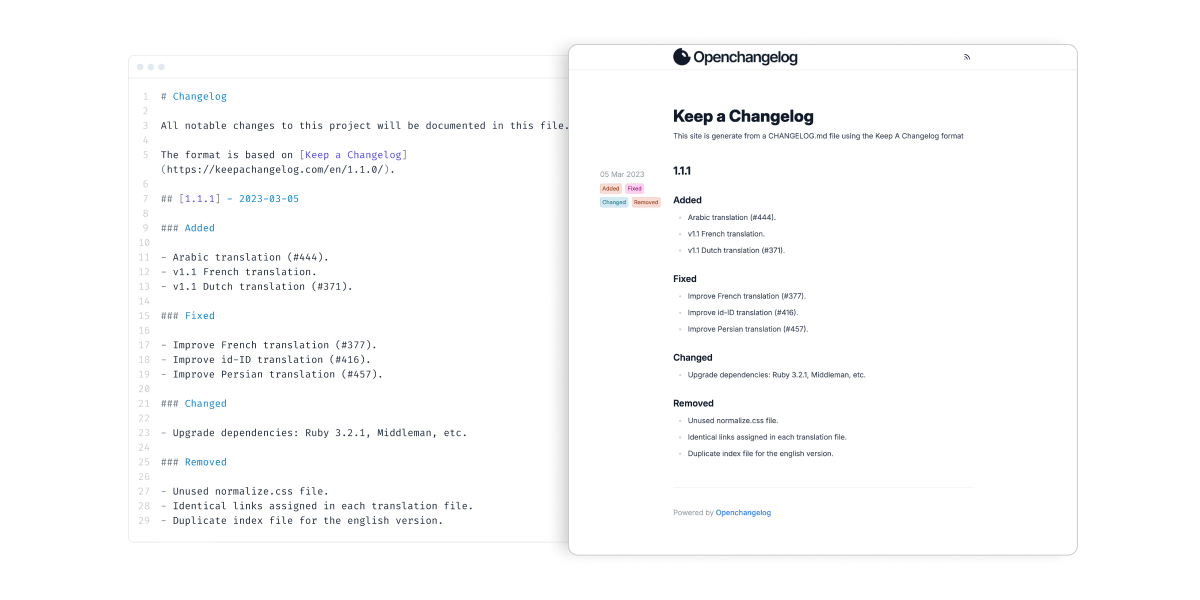
Openchangelog turns your CHANGELOG.md file into a beautiful website, giving your release notes the visibility they deserve.
Let’s explore how to integrate Openchangelog to achieve this.
Understanding the Keep A Changelog format
Before integrating Openchangelog we will have to understand how to write changelogs using the keep a changelog format. Adhering to this format allows tools like Openchangelog to parse the file and present your release notes to your audience.
Here are the key elements of this format:
- Latest version first: Each release version is listed in descending order, with the most recent version at the top.
- Grouped changes: Changes are categorized by type (e.g., Added, Changed, Deprecated, Removed, Fixed, Security), keeping similar updates together.
- Included release date: Every version includes a release date, ensuring users know when changes were made.
- Unreleased section: At the top, you may include an Unreleased section to track upcoming changes and improve maintainability.
Here’s an example CHANGELOG.md:
# Changelog
All notable changes to this project will be documented in this file.
The format is based on [Keep a Changelog](https://keepachangelog.com/en/1.1.0/), and this project adheres to [Semantic Versioning](https://semver.org/).
## [Unreleased]### Added- Support for dark mode.
## [1.0.1] - 2024-10-15### Fixed- Fixed a bug where the app would crash on startup.- Corrected typos in the documentation.
## [1.0.0] - 2024-09-01### Added- Initial release of the project.- Added user authentication.- Implemented basic CRUD operations.
Integrate your changelog with Openchangelog
Openchangelog offers deep integration with GitHub, allowing you to manage your release notes directly from your GitHub repository. This approach provides version control to track changes and roll back if necessary, and it encourages collaboration among team members in pull requests to ensure every feature or fix is well documented.
To get started with Openchangelog, follow our Quickstart guide, which walks you through creating your account.
After setting up your first changelog, navigate to the Sources page and connect your GitHub account if you haven’t done so already. You’ll be prompted to install our GitHub app, which grants read access to your public and private repositories.
Next, create a GitHub source for your changelog by specifying the repository and the path to your CHANGELOG.md file.

Once you’ve created the source, activate it. Openchangelog will then use this source to load and parse your changelog file from GitHub.

Conclusion
That wasn’t so hard, was it? You now have an automated changelog page integrated with your GitHub repository! This setup ensures your release notes are always up-to-date and easily accessible to your audience.
Additionally, you can explore other features like an automated RSS feed, password protection for your changelog page or even bring your own custom domain for a more personalized touch.