Create a Changelog in Next.js with GitHub integration
Learn how to build a changelog for Next.js with Markdown support and a GitHub integration
Jonas
Oct 27, 2024

Table of Contents
Creating a changelog with GitHub integration, Markdown support, and optimized SEO can be a time-consuming task.
Most developers end up with either a basic CHANGELOG.md hidden in their repo or spend weeks building a custom solution.
This guide shows you how to build a proper changelog system in Next.js that automatically stays in sync with your GitHub repository while providing a great user experience, giving your release notes the visibility they deserve.
We will be using Openchangelog which allows parsing your CHANGELOG.md into a website, provided it follows the keep a changelog format.
For less technical release notes, Openchangelog also supports organizing release notes as separate Markdown files, check out our docs for more details.
Our Next.js package allows embedding the parsed webpage directly into your app. Let’s get started!
What we’ll build
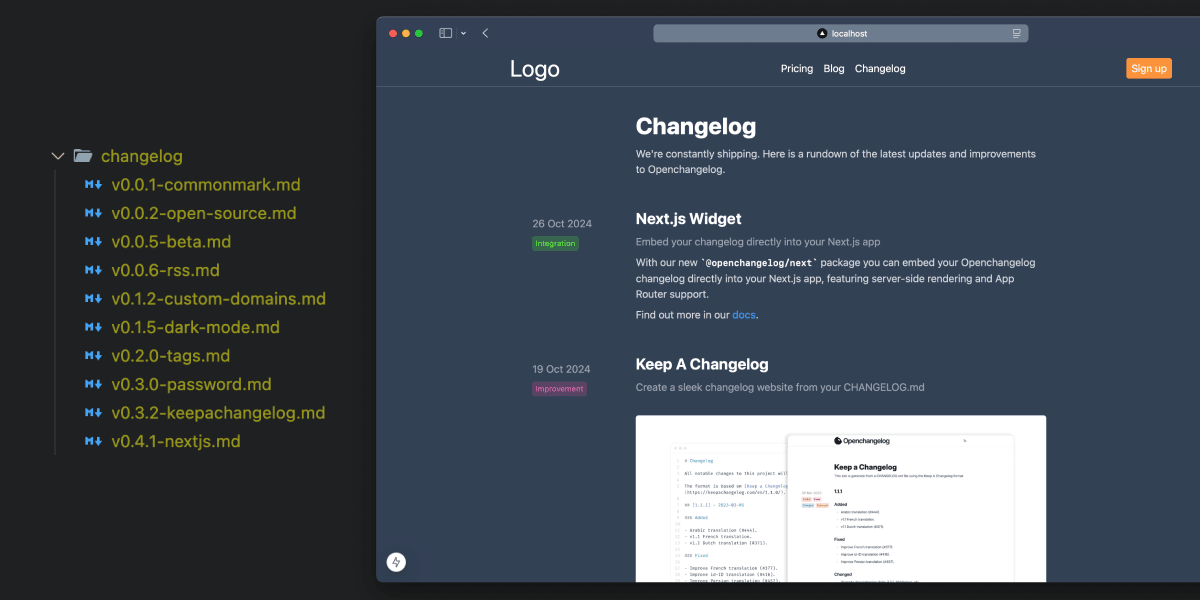
First, here’s a quick peek at what we’re building:
- Synchronisation with your changelog from GitHub
- SEO friendly because of SSR, no iframe 🎉
- Customizable to match your overall site style
- Support for both single
CHANGELOG.mdor multiple Markdown files
Prerequisites
Before we start, make sure you have:
- Completed our Quickstart guide to publish your first Changelog and connect your GitHub account
- Or a self-hosted instance of Openchangelog
Project Setup
Let’s start with a fresh Next.js project. If you already have one, skip to the next section:
npx create-next-app@latest changelog-democd changelog-demoWe’ll need to install the @openchangelog/next package to embed our parsed changelog into the Next.js app.
npm install @openchangelog/nextIntegrate Openchangelog in Next.js
With your Next.js project set up and the Openchangelog package installed, it’s time to use the Changelog component and configure it to embed your changelog.
Step 1: Import and Configure the Openchangelog Component
Let’s create the new page for your changelog at /changelog. Since the package is designed to be used with App Router create the file app/changelog/page.tsx.
import { Changelog } from "@openchangelog/next"
export default function ChangelogPage() {    return (        <Changelog            workspaceID="ws_xxxx" // when using Openchangelog cloud            changelogID="cl_xxxx" // when using Openchangelog cloud            baseUrl="https://your-openchangelog-instance.com" // when self-hosting        />    );}
In the Changelog component:
- workspaceID is the id of your workspace when using Openchangelog Cloud
- changelogID is the id of the changelog you want to display
- baseUrl is the url to your self-hosted instance
To find your workspaceID and changelogID in Openchangelog Cloud, head to your changelogs Embed settings and copy the code block:
 This setup ensures that the
 /changelog page is server-rendered for optimal SEO.
Step 2: Configure Suspense boundary
Since the Changelog component is a server component, we can use Suspense to display a loading indicator while it loads:
export default function ChangelogPage() { return ( <Suspense fallback={<p>Loading...</p>}> <Changelog /> </Suspense> );}Step 3: Customizing the Changelog Style
You can use the theme property to configure the typography style of the changelog.
You have full creative control over the rest of the page. Since the Changelog component behaves like any other React component, you can adjust its position, change the background, and much more.
This example below showcases the flexibility you have to customize the changelog to match your app’s style.

Conclusion
That wasn’t so hard, was it? You’ve successfully created a dynamic changelog in your Next.js app with a GitHub integration, Markdown support, and full SEO benefits.
With Openchangelog, every time you push new updates to GitHub, your changelog page will automatically stay in sync, keeping your users up-to-date with minimal effort.